
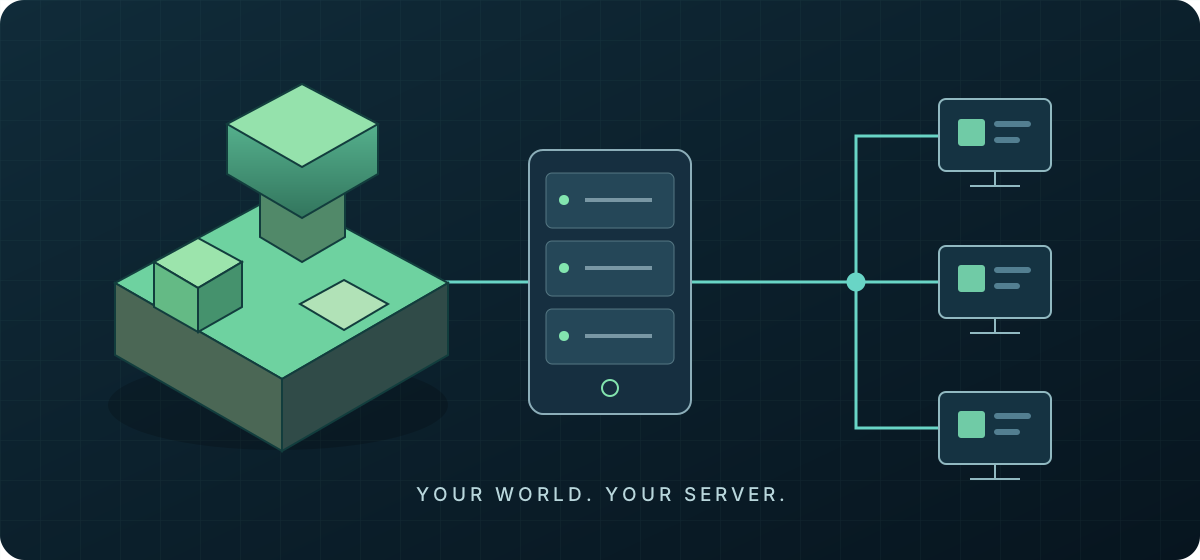
How to Host a Minecraft Server in 2026: Complete Beginner Guide
Hosting a Minecraft server means running Minecraft server software on a computer that stays online while people play and accepts connections from their game clients. To get started, install compatible Java, download the server JAR, run it once, accept the EULA if you agree, configure the world, and allow players through the network firewall.
This guide focuses primarily on Minecraft: Java Edition. It covers Windows at home and an Ubuntu/Linux VPS, followed by Paper, performance, backups, and security. You do not need to buy hosting before learning the process.
There are three common places to host: your home PC, a VPS or cloud server, or managed Minecraft hosting. Start with the Windows instructions for a home computer, or jump to Ubuntu/VPS setup for a Linux server. The configuration and maintenance sections apply to both.
Version check — September 20, 2026: Paper's current compatibility table recommends Java 21 for Paper 1.20–1.21.11 and Java 25 for Paper 26.1+. Minecraft's official 26.1 release also requires Java 25. Always check the Java requirement for the exact Minecraft/Paper version you plan to run. Sources: Paper requirements and Minecraft 26.1 release notes.
What Do You Need to Host a Minecraft Server?
| Requirement | What you need |
|---|---|
| Minecraft edition | Java Edition clients with a version compatible with the server |
| Java | A supported runtime for the exact server release |
| CPU | Strong single-thread performance; requirements vary with workload |
| RAM | Enough Java heap plus memory for the OS and other processes |
| Storage | SSD/NVMe preferred, with spare space for worlds and backups |
| Network | Stable connectivity and adequate upload capacity |
| Port | TCP 25565 by default for Java gameplay |
| Public access | A reachable public address, home forwarding where needed, or a suitable hosted endpoint |
| Operating system | Windows or a supported Linux distribution |
| Administration | Local file access, or an SSH account with sudo on a VPS |
Minecraft does not have a universal “four cores required” rule. Much of the tick workload is sensitive to single-thread CPU performance. Entities, redstone, loaded chunks, plugins, and mods determine how busy that thread becomes; additional cores still help with other work. A VPS vCPU count alone cannot predict player capacity.
Keep the game client and server on compatible releases. Bedrock players cannot join this ordinary Java server directly. A Minecraft dedicated server here means a separate server process; it does not require renting an entire physical dedicated machine.
How Much RAM Does a Minecraft Server Need?
These practical starting points describe Java heap, not official minimums or guaranteed player limits:
| Server type | Suggested starting heap |
|---|---|
| 2–5 Vanilla players | 2–3 GB |
| 5–10 Vanilla players | 3–4 GB |
| 10–20 players | 4–6 GB |
| Paper with plugins | 4–8 GB, depending on workload |
| Modpacks | 6–12+ GB, depending on the pack |
Player count, view distance, simulation distance, plugins, mods, world size, and new chunk generation all matter. A large world mainly consumes disk space; the actively loaded part and associated data drive memory use. Check a modpack's own server requirements before allocating resources.
The examples below use -Xms2G -Xmx4G: a 2 GB initial heap and a 4 GB maximum heap. Use them only on a machine with enough memory left for the OS, Java's non-heap allocations, and any game client or other services. For a small server on a 4 GB VPS, begin with a smaller heap, such as -Xms1G -Xmx2G, and monitor it.
More RAM does not automatically improve tick performance. A CPU-bound server can remain slow with plenty of free memory, and an unnecessarily large heap can change garbage-collection behavior. Measure before increasing it.
Method 1: Host Minecraft on Windows
Step 1: Install compatible Java
Choose a supported 64-bit Java build for your server version using Paper's Java installation guide. Its Windows instructions link to the Amazon Corretto installer; select the required major version and your machine's architecture. Install it, then open a new PowerShell window and check:
java -version
Get-Command java
For Minecraft/Paper 26.1, expect Java 25. For another release, check its requirement first. The Java bundled inside the Minecraft launcher is not necessarily available to PowerShell. If java is missing, configure the installed runtime's bin directory in Windows PATH using the installer's options, then reopen PowerShell. If an old Java appears, inspect Get-Command java and correct PATH.
Step 2: Create a server folder
Use a dedicated folder, rather than scattering files across the Desktop:
New-Item -ItemType Directory -Force -Path C:\MinecraftServer
Set-Location C:\MinecraftServer
Use an account with write access to this folder. Minecraft itself does not need an Administrator terminal; elevation is only needed later for the firewall rule.
Step 3: Download the official Minecraft server
Open the official Minecraft Java server download page, read its notices, and download the server JAR for the release you intend to use. Save it in C:\MinecraftServer as server.jar. Enable file-name extensions in File Explorer so it does not accidentally become server.jar.jar.
This tutorial links to Mojang's distribution rather than redistributing its JAR. Do not use an unofficial download mirror. If your goal is plugins, finish the basic setup first, then use the Paper section.
Step 4: Run the server once
In the same PowerShell window:
Set-Location C:\MinecraftServer
java -Xms2G -Xmx4G -jar server.jar nogui
-Xms sets the initial heap; -Xmx sets its upper limit. -jar identifies the executable file. nogui disables the graphical server window. Adjust memory before running this command if your computer cannot spare a 4 GB heap.
On a fresh folder, the server normally creates initial configuration files and exits because the EULA has not been accepted. That is an expected first-run stop, not a reason to disable security settings.
Step 5: Read and accept the EULA if you agree
Read the Minecraft EULA. Open the generated file:
notepad C:\MinecraftServer\eula.txtOnly if you agree, change this line:
eula=falseTo:
eula=trueSave the file. If you do not agree, do not continue. Public or monetized communities should also read the Minecraft Usage Guidelines; this setup guide does not grant permission to ignore those rules.
Step 6: Start again and test locally
java -Xms2G -Xmx4G -jar server.jar noguiWait for world generation and the Done message. Typical files now include server.properties, whitelist.json, ops.json, world/, and logs/. Some appear only after the relevant initialization. The world directory stores your progress; the JAR alone is not a backup.
In Minecraft Java Edition, choose Multiplayer → Add Server, and enter localhost when playing on the same PC. Use the matching client release. To shut down safely, type this in the server console, not PowerShell:
stopWait until it finishes saving and PowerShell returns. Avoid closing the terminal or forcing the process to end. Keep the PC awake while friends are playing, and plan Windows restarts around play sessions.
Configure server.properties
Stop the server before editing server.properties. On Windows, open it with Notepad; on Linux, use the editor shown in the VPS steps. Change the existing keys instead of appending duplicates.
This is a suggested private-server configuration, not a claim that every value is a default:
server-port=25565
server-ip=
online-mode=true
white-list=true
enforce-whitelist=true
max-players=10
view-distance=10
simulation-distance=10
motd=My Minecraft Server
enable-rcon=false
enable-query=false
Paper's current server.properties reference lists 25565, online-mode=true, and distances of 10 as defaults; it lists max-players=20 and white-list=false, which this example deliberately changes. Treat your exact version's generated file and documentation as authoritative.
- server-port: the TCP port players reach. Change the firewall and connection address too if you change it.
- server-ip: normally leave this blank. A router's public IP is not an address assigned to your PC and should not be inserted here.
- online-mode: keep
truefor account authentication. Do not turn it off to fix connectivity or bypass ownership checks. - white-list: admits only approved players.
enforce-whitelist=truealso enforces removals against connected players. - max-players: caps simultaneous admissions; raising it does not create CPU or memory capacity.
- view-distance: affects how many chunks are sent and kept around players, increasing CPU, RAM, and bandwidth demand.
- simulation-distance: controls the area actively simulated, including mobs, entities, and redstone workloads.
- motd: the description in the multiplayer list. Keep remote administration and query listeners off unless you specifically need and secure them.
Restart and add your own account and friends from the Minecraft server console, replacing the example names with real Java usernames:
whitelist add YourMinecraftName
whitelist add FriendMinecraftName
whitelist list
Console commands do not need a leading /. In-game commands do. If you need in-game administration, grant operator status only to your own trusted account using op YourMinecraftName in the console. Never grant every player operator privileges. Later, an authorized operator can use /whitelist add FriendMinecraftName while a systemd service is running.
How to Let Friends Join Your Minecraft Server
On the same network
On the Windows host, find the IPv4 address of the active Wi-Fi or Ethernet adapter:
ipconfigOn Linux, use:
ip -4 addressChoose the LAN address on the actual network interface, not loopback, a Docker bridge, or an unrelated VPN adapter. An example is 192.168.1.50. Friends on that network enter it under Multiplayer → Add Server. They cannot use localhost, because that refers to their own computers. For a nondefault port, use 192.168.1.50:25566 instead.
The host firewall must still permit connections. Guest Wi-Fi and wireless client isolation can prevent devices from reaching each other even when they share an internet connection.
Windows Firewall: allow only the game port
Open Windows Security → Firewall & network protection → Advanced settings → Inbound Rules → New Rule. Select Port, TCP, and Specific local ports: 25565, then Allow the connection. Select the profile matching your intended hosting network and name the rule Minecraft Java TCP 25565.
For a trusted home LAN configured as Private, the equivalent Administrator PowerShell command is:
New-NetFirewallRule -DisplayName "Minecraft Java TCP 25565" -Direction Inbound -Action Allow -Protocol TCP -LocalPort 25565 -Profile Private
Get-NetConnectionProfile
A Private-profile rule also handles internet traffic forwarded to that Private-profile interface; the profile is about the network adapter, not whether a player is remote. If the interface is Public, choose the applicable profile deliberately rather than assuming the rule above applies. Do not mark an untrusted Wi-Fi network Private just to host a game. See Microsoft's firewall guidance.
Never disable the entire firewall just to make Minecraft work. Java gameplay needs this TCP port, not every Java process and not an arbitrary range of ports.
Port forwarding: let friends connect over the internet
For typical home IPv4 hosting, you need a public IPv4 address, an inbound firewall rule, and a router forwarding rule. Reserve the host's LAN address with the router's DHCP reservation feature so it remains stable.
Log into your router and find Port Forwarding, NAT, or Virtual Server. Menus vary by router; use its documentation. Create this mapping:
| Router field | Example value |
|---|---|
| Name | Minecraft Java |
| Protocol | TCP |
| External/WAN port | 25565 |
| Internal destination | 192.168.1.50 — replace with your host's LAN IP |
| Internal/LAN port | 25565 |
The connection path is:
Friends' Java clients
        |
     Internet
        |
Your public IPv4 : TCP 25565
        |
Router port forward -> 192.168.1.50:25565
        |
Host firewall allows TCP 25565
        |
Minecraft server process
Get the current public IPv4 from your router's WAN/internet status and compare it with the address reported by an external IP-check service using that same connection, with VPNs disabled. Share the public address privately with your friends. If it changes, update them or use dynamic DNS. Do not share the example 192.168.1.50 with internet players; private addresses are not routed across the internet.
Test with a friend outside your home or a computer using a phone hotspot. Testing your public IP from inside the LAN can fail when the router lacks NAT loopback, even if external players can connect. Keep the server running during every port test. A successful TCP connection only verifies the network path; joining the game additionally checks version compatibility and the whitelist.
A directly reachable VPS usually replaces the home router with the provider's public-IP and firewall configuration. A provider using NAT may instead supply a specific port mapping. Follow that provider's assigned endpoint.
Why Port Forwarding Sometimes Doesn't Work: CGNAT
Some internet providers use carrier-grade NAT (CGNAT): multiple customers share a public IPv4 address behind the ISP's equipment. Forwarding a port on your own router cannot configure the ISP's upstream NAT.
Compare the router's WAN IPv4 with an externally observed public IPv4. A WAN address in 100.64.0.0/10 or a private range is a clue. Different addresses can also result from another home router, VPN use, or other upstream NAT; the comparison alone does not prove CGNAT. Ask the ISP to confirm.
If you have two routers, forwarding may be required at both, or the ISP device may support an appropriate bridge configuration. If the ISP controls the upstream NAT, practical options include requesting a public IP, moving the server to a VPS/cloud instance, using a suitable TCP tunnel, or choosing managed hosting. Check a tunnel's latency, access model, and terms before depending on it.
Working public IPv6 can be another route when every player has IPv6 connectivity. It still needs firewall rules and suitable DNS; do not assume it solves access for IPv4-only friends.
Method 2: Host Minecraft on Ubuntu/Linux VPS
The concrete package example targets Ubuntu 24.04 LTS on x86-64, with sudo access and systemd. Debian-based distributions use similar commands, but package availability differs. Choose the server release and Java major version first. Use an SSH key for your administrator account and keep provider-console access available.
Step 1: Update the server
Run these commands in Linux Bash over SSH, not Windows PowerShell:
sudo apt update
sudo apt upgrade -y
sudo apt install -y curl ca-certificates nano ufw software-properties-common
If the OS reports that a restart is required, reboot during setup and reconnect before continuing. On an existing shared VPS, schedule upgrades around other applications.
Step 2: Install the correct Java version
Check the current runtime; “command not found” simply means one is not installed:
java -versionFor a 26.1-era Java/Paper server requiring Java 25, Ubuntu's Noble repositories now publish OpenJDK 25. Enable Universe, refresh indexes, and inspect the candidate first:
sudo add-apt-repository -y universe
sudo apt update
apt-cache policy openjdk-25-jre
sudo apt install -y openjdk-25-jre
java -version
readlink -f /usr/bin/java
Use the full runtime, not just its headless package: Paper's Java guide specifically warns about missing dependencies in headless installations. The package family is listed in Ubuntu's Noble package index. Do not copy Ubuntu repository definitions onto Debian.
If your package candidate is (none), stop and follow the official Paper Java guide's supported distribution instructions, or use a supported Ubuntu image with the package available. For Paper 1.20–1.21.11, its table recommends Java 21; install the corresponding openjdk-21-jre instead. These are version-specific branches, not a rule that every server should use the newest Java.
If several Java versions are installed, select the intended default and verify it:
sudo update-alternatives --config java
/usr/bin/java -version
The service below uses /usr/bin/java. On a VPS with other Java applications, use the correct absolute Java executable in the service instead of changing their shared default.
Step 3: Create a dedicated Minecraft user and directory
sudo adduser --system --home /opt/minecraft --group minecraft
sudo install -d -o minecraft -g minecraft -m 0750 /opt/minecraft/server
This service account owns the game files and has no normal interactive login. The directory is intentionally private; the later startup commands change directory inside a shell running as minecraft, rather than requiring your administrator account to enter it directly. Your administrator uses sudo for management; Minecraft runs as minecraft, never root. Do not use chmod 777 to work around file errors.
Step 4: Download the server JAR from its official source
Open the official Minecraft download page on your own computer. Copy the actual server JAR link for your selected release, not the web page URL. Paste it at this prompt in the SSH session:
read -r -p 'Paste the official HTTPS server JAR download URL: ' SERVER_JAR_URL
sudo -u minecraft curl --fail --location --proto '=https' --proto-redir '=https' \
  "$SERVER_JAR_URL" -o /opt/minecraft/server/server.jar
unset SERVER_JAR_URL
sudo -u minecraft ls -lh /opt/minecraft/server/server.jar
The URL is intentionally supplied from the current official download page instead of freezing a version-hash URL in this article. Check the selected file and release before continuing. A tiny HTML file or Invalid or corrupt jarfile usually means a page URL was copied instead of a JAR link. Where the publisher provides a checksum, verify the downloaded file against that published value.
For a Paper deployment, use the official Paper downloads and its version requirements; the later Paper section explains the filename change.
Step 5: Run once and review the EULA
sudo -u minecraft sh -c '
  cd /opt/minecraft/server &&
  exec /usr/bin/java -Xms2G -Xmx4G -jar server.jar nogui
'
After the expected EULA stop, read the Minecraft EULA, then edit the file as the service user:
sudo -u minecraft nano /opt/minecraft/server/eula.txtIf you agree, manually change eula=false to eula=true and save. In Nano, use Ctrl+O, Enter, then Ctrl+X. No command here automatically accepts the agreement for you.
Step 6: Configure, start, and add players
sudo -u minecraft nano /opt/minecraft/server/server.propertiesApply the private-server settings from server.properties, then run:
sudo -u minecraft sh -c '
  cd /opt/minecraft/server &&
  exec /usr/bin/java -Xms2G -Xmx4G -jar server.jar nogui
'
Wait for Done. In this Minecraft console, add your users with whitelist add YourMinecraftName and optionally give your trusted administrator op YourMinecraftName. Then enter stop and wait for saving to finish before moving to systemd. Do not run the manual process and the service at the same time: they would compete for the same world and port.
Run Minecraft as a systemd Service
A systemd service starts after boot and keeps running when SSH disconnects. Create its unit as the administrator:
sudo nano /etc/systemd/system/minecraft.servicePaste this unit file, adjusting the heap for your actual machine:
[Unit]
Description=Minecraft Java Server
Wants=network-online.target
After=network-online.target
StartLimitIntervalSec=300
StartLimitBurst=5

[Service]
Type=simple
User=minecraft
Group=minecraft
WorkingDirectory=/opt/minecraft/server
ExecStart=/usr/bin/java -Xms2G -Xmx4G -jar /opt/minecraft/server/server.jar nogui
Restart=on-failure
RestartSec=10
KillSignal=SIGINT
TimeoutStopSec=300
UMask=0027
NoNewPrivileges=true
PrivateTmp=true
ProtectHome=true
ProtectSystem=full

[Install]
WantedBy=multi-user.target
The service runs with restricted permissions and restarts after failures, with a limit to prevent an endless rapid crash loop. On systemctl stop, SIGINT requests Java's normal shutdown path so Minecraft can save. The five-minute timeout is a starting point; watch shutdown logs for a large world and allow longer if necessary. A timeout followed by a forced kill is not a verified clean save.
Check the unit and start it:
sudo systemd-analyze verify /etc/systemd/system/minecraft.service
sudo systemctl daemon-reload
sudo systemctl enable minecraft
sudo systemctl start minecraft
sudo systemctl status minecraft --no-pager
sudo journalctl -u minecraft -n 100 --no-pager
Follow live logs with sudo journalctl -u minecraft -f. Ctrl+C here exits the log viewer, not the server. A journal window is not an interactive Minecraft console. Use your authorized in-game account for commands, or stop the service and run the server manually under minecraft when offline console access is necessary. Do not expose RCON just to obtain a console.
For routine changes:
sudo systemctl stop minecraft
sudo journalctl -u minecraft -n 50 --no-pager
sudo systemctl start minecraft
Edit files between the stop and start, after confirming a completed save. If startup failures hit the limit, fix the error shown in the journal, then use sudo systemctl reset-failed minecraft before starting again.
Ubuntu Firewall / UFW and Provider Firewalls
Before enabling UFW over SSH, explicitly allow the SSH port you actually use. The example below assumes the standard port 22. For a custom port, replace the OpenSSH rule with your real port rule. Prefer restricting SSH to a stable administrator IP or VPN where practical.
sudo ufw allow OpenSSH
sudo ufw allow 25565/tcp
sudo ufw status verbose
sudo ufw enable
sudo ufw status verbose
Keep the existing SSH session open and verify a second SSH login before closing it. If UFW is already enabled, adding rules takes effect without disabling the firewall. See Ubuntu's firewall documentation.
Your provider's cloud firewall/security group is a separate layer. Allow inbound TCP 25565 there too, and preserve your restricted SSH access. A private group with stable IPs can restrict the game rule to those source addresses. Do not open UDP 25565, RCON, database ports, or unrelated management interfaces for this basic Java setup.
Verify the process is listening:
sudo ss -ltnp 'sport = :25565'
sudo systemctl status minecraft --no-pager
Friends then enter the VPS public IP in Java Edition. From an external Windows machine, a basic TCP test is:
Test-NetConnection -ComputerName YOUR_SERVER_PUBLIC_IP -Port 25565Replace YOUR_SERVER_PUBLIC_IP with the actual address. Once that succeeds, test joining with a whitelisted account and the correct game version.
Home PC vs VPS vs Managed Hosting
| Option | Best for | Advantages | Drawbacks |
|---|---|---|---|
| Home PC | Small private groups | Existing hardware; no separate hosting subscription | PC must stay awake; home upload, forwarding, and CGNAT can interfere |
| VPS | Control and continuous availability | OS access, flexible deployments, publicly reachable networking where supplied | You maintain Linux, updates, security, and backups |
| Managed Minecraft hosting | Beginners who want a panel | Game-oriented console, installation, and backup tools | Less system-level control; features vary by plan |
Choose by how much administration you want to do. For provider comparisons, use our best Minecraft server hosting guide. For infrastructure choices, see Minecraft VPS hosting and game VPS options. These buying guides serve a different purpose from this setup tutorial.
Hosting Minecraft on a VPS with LightNode
A VPS option for an always-available world
If your home connection has no reachable public IP, or you want the server online without leaving your own PC running, LightNode Game Server Hosting is one option to consider. Its current game page advertises Minecraft deployments on KVM VPS infrastructure, 40+ locations, hourly/monthly billing, and NVMe storage. Choose a region near your players and resources appropriate for the world.
A VPS can also suit a future website, bot, or database alongside Minecraft, provided you budget resources and secure each service. Confirm OS/root access, the assigned public-IP arrangement, region availability, and the selected plan before ordering. We do not assume an identical IP product or measured game performance across every location.
Affiliate disclosure: VPS SOS may earn a commission through this link at no additional cost to you. Product details were checked September 20, 2026; confirm the current order terms.
Home hosting and managed hosting remain valid choices. This tutorial's commands apply to a manually configured Ubuntu VPS; a preinstalled game image may use different paths or services.
Vanilla vs Paper: Which Should You Use?
Vanilla is Mojang's official server software. Use it for a simple private world or when matching official mechanics is the priority. Paper adds plugin support and administration/performance features. It can suit a growing community, but its behavior is not identical to Vanilla; technical redstone builds and some farms deserve testing.
Download Paper only from its official downloads page, choose the game release, and check Paper's startup requirements. Stop the current server and create a full backup first. Save the downloaded file as paper.jar in the server directory.
For a fresh Paper folder, the same first-start and EULA process applies. A short Windows PowerShell startup command is:
java -Xms2G -Xmx4G -jar paper.jar --noguiOn Linux, make the uploaded JAR readable by the service user and run from the correct directory:
sudo chown minecraft:minecraft /opt/minecraft/server/paper.jar
sudo -u minecraft sh -c '
  cd /opt/minecraft/server &&
  exec /usr/bin/java -Xms2G -Xmx4G -jar paper.jar --nogui
'
For systemd, stop the manual process cleanly and change ExecStart to:
ExecStart=/usr/bin/java -Xms2G -Xmx4G -jar /opt/minecraft/server/paper.jar --noguiThen run sudo systemctl daemon-reload and sudo systemctl start minecraft. The heap is an example, not Paper's universal optimum. Keep one active startup configuration so a reboot does not accidentally launch the old Vanilla JAR.
World layout can change during migration. Paper commonly uses separate world, world_nether, and world_the_end directories, while Vanilla keeps dimensions under the main world directory. Follow Paper's migration guide when moving in either direction; do not assume exchanging JAR files alone safely reverses a migration.
Plugins, Mods, and Modpacks
Paper/Bukkit plugins usually add server-side features without requiring every player to install a matching client mod. Forge/Fabric mods are a different system: a mod may be server-only, client-only, or required on both sides. Modpacks combine a loader and multiple mods, often with substantially higher resource requirements. Paper does not load Forge/Fabric mods as ordinary plugins.
For Paper plugins, follow the official plugin installation guide:
- Choose a trusted project and verify the Minecraft/Paper version, dependencies, and current release status.
- Stop the server and make a backup.
- Place the plugin JAR in the server's
plugins/directory; on Linux ensureminecraftcan read it and write its configuration directory. - Restart, inspect startup logs, and review the generated configuration.
- Test with one plugin change at a time. Prefer a full restart to hot-reload commands.
Plugins execute code with the server user's privileges. Download from the project's official distribution channel, not a random reposted JAR. A free plugin is not automatically safe.
For a modded setup, continue with our Modrinth multiplayer server tutorial. The CurseForge server hosting guide covers that ecosystem and hosting choices. Use the exact pack's server files and instructions rather than putting a client modpack into Paper's plugin folder.
How to Improve Minecraft Server Performance
Start with CPU and a repeatable workload
Record what happens when the problem appears: player count, locations, farms, entities, and new terrain exploration. Check whether a main thread is saturated rather than relying on total machine CPU percentage. A server can bottleneck on one core while other cores are mostly idle. Shared-host CPU contention may also vary over time.
Allocate sufficient RAM and use fast storage
Watch heap use, garbage collection, and the OS's available memory. Avoid sustained swapping. Add memory when evidence shows pressure; remove leaking or unnecessary plugins when they are the cause.
SSD/NVMe storage helps world loading, chunk data, saves, and backup I/O. It does not reduce network ping. Leave disk space for world growth and temporary backup archives, and avoid compressing large backups during peak play if storage or CPU is already busy.
Reduce view distance and simulation distance separately
Try reducing view-distance from 10 to 8, then measure the difference. If entity simulation is the bottleneck, try a lower simulation-distance, such as 6. These are experiments, not settings guaranteed to fit every world. Restart after file changes and ask players whether the reduced range affects their builds.
Pre-generate chunks carefully
Pre-generating a bounded area moves terrain generation work into a maintenance window so exploration produces fewer generation spikes during play. It consumes storage and CPU upfront and does not remove entity or plugin lag. Set a sensible world border and make a backup first. Use a currently maintained tool compatible with your exact server release; no particular third-party pregenerator is assumed by this guide.
Profile before removing plugins or buying more resources
Current Paper includes the spark profiler. During a slowdown, an authorized in-game operator can run:
/spark profiler start --timeout 600This collects ten minutes of data and returns a report link. See Paper's profiling instructions. Review reports before sharing them publicly because they can reveal details of your server. Investigate plugins or tasks consuming excessive tick time, reproduce the issue in a test copy, and change one thing at a time.
Understanding TPS and MSPT
At its normal tick rate, Minecraft targets 20 ticks per second (TPS). That leaves about 50 milliseconds per tick (MSPT). If processing consistently takes more than the available 50 ms, the server cannot sustain normal 20 TPS under that load. Watch spikes as well as averages.
TPS describes simulation progress. Ping describes network round-trip latency. A server can maintain 20 TPS while a distant player has high ping. Conversely, a nearby player can have low ping while entities stutter on an overloaded server. Choose a region closer to players for network problems; profile tick work for simulation problems. Adding RAM is not a general fix for either one.
How to Back Up a Minecraft Server
Back up the entire server directory, not just the JAR or one world folder. Include all actual world directories, server.properties, whitelist.json, ops.json, ban lists, plugin JARs/configs, mod configs, and other important server settings. Also save the systemd unit and a note of Java/server versions. If a plugin uses an external database, arrange a consistent database backup separately.
For Vanilla, Nether and End data normally live inside the main world directory. Paper or multiworld plugins may use world_nether, world_the_end, and other directories. Follow the files actually present.
A safe stopped-server backup on Ubuntu
Tell players about the maintenance window. Stop the service and review its final log entries:
sudo systemctl stop minecraft
sudo systemctl status minecraft --no-pager
sudo journalctl -u minecraft -n 80 --no-pager
An inactive status after stopping is expected; systemctl status may return a nonzero shell status for it. Continue only after confirming a clean completed save, with no timeout or forced kill. Then run these Bash commands in the same shell:
sudo install -d -o root -g root -m 0700 /var/backups/minecraft
BACKUP_FILE="/var/backups/minecraft/server-$(date -u +%Y%m%dT%H%M%SZ).tar.gz"
sudo tar -czf "$BACKUP_FILE" -C /opt/minecraft server
sudo tar -tzf "$BACKUP_FILE" > /dev/null
sudo cp /etc/systemd/system/minecraft.service /var/backups/minecraft/minecraft.service
sudo systemctl start minecraft
sudo systemctl status minecraft --no-pager
If tar reports an error, keep earlier backups and investigate; do not count that archive as a successful backup. Copy successful archives to protected storage on another machine or a backup service. An archive on the same VPS cannot protect against losing that VPS or disk.
Windows backup and restoration checks
On Windows, type stop in the game console, wait for saving to finish, then copy the whole C:\MinecraftServer folder to a dated backup folder. Copy that backup to a second device or off-server destination before restarting the game. Avoid copying a live world with an ordinary file copy.
Schedule daily backups plus backups before updates or plugin changes. Keeping seven daily and four weekly copies is a reasonable starting retention policy, not a mandatory standard. Automated live backups require a backup method that coordinates world saving and plugin data; a generic file-copy cron job is insufficient.
Regularly extract an archive into an isolated test directory, use the matching server/Java version, and confirm the world loads, inventories exist, and Nether/End data is present. On production restoration, stop the service, preserve the current files separately, restore the complete matching set, and correct ownership to minecraft:minecraft before starting. Never overwrite a running world or test a restored copy against production's port or database.
Minecraft Server Security Checklist
For updates, stop safely, preserve a full backup, replace only the intended software files, and inspect startup logs. Test major version changes on a copy; downgrading a world by dropping in an older JAR is not a safe rollback plan. Restore the matching pre-upgrade backup instead.
Sharing a home server address also reveals your home internet endpoint to recipients. A whitelist controls who joins the game; it does not hide the address or prevent network-level attacks. Share connection details with the intended group.
Use a Domain Instead of an IP Address
Create an A record such as play.example.com pointing to your public IPv4 address. Add an AAAA record only when the server and your firewall genuinely support reachable IPv6. Do not put a port into an A/AAAA record. For Java's default TCP 25565, players can enter play.example.com directly.
For a nondefault port, the simplest address is play.example.com:25566. Java clients can also discover that port through an SRV record. For example:
| DNS field | Value |
|---|---|
| Type | SRV |
| Name | _minecraft._tcp.play.example.com |
| Priority / weight | 0 / 5 |
| Port | 25566 |
| Target | mc-origin.example.com |
Create an A/AAAA record for mc-origin.example.com pointing to the server first. Some DNS panels split service, protocol, and name into separate fields or automatically append your domain; avoid entering the zone twice. Players then use play.example.com. SRV does not open a firewall or bypass CGNAT.
Use ordinary DNS-only records unless you have a proxy product specifically supporting Minecraft TCP traffic. Standard HTTP website proxies do not automatically proxy the game protocol. After an IP change, allow for DNS caching and update dynamic DNS where necessary.
Minecraft Server Troubleshooting
Connection refused
Check that the process is running and listening on the expected TCP port. On Linux, inspect systemctl status minecraft, the journal, and ss -ltnp. On Windows, check the server console for Done or a crash. Verify the address, port, bind settings, and both firewalls. “Refused” commonly indicates no listener or an active rejection; it does not identify the failing component by itself.
Connection timed out
Check the current public IP, home router forwarding, destination LAN address, cloud firewall, and possible CGNAT. Test locally, then from another LAN device, then from an external network to isolate the failing layer. A port-checking website cannot report an open game listener while your server is stopped.
Unsupported Java version or UnsupportedClassVersionError
Run java -version. On Windows, inspect Get-Command java; on Linux, compare /usr/bin/java -version with the exact executable in ExecStart. A working shell can use a different Java than systemd. Match the version to the selected server release, then restart.
“Can't keep up!” warnings
An occasional warning during world generation differs from continuous lag during normal play. Investigate CPU overload, new chunks, excessive entities, plugins/mods, garbage collection, and disk I/O. Profile while the slowdown is occurring. Do not immediately assume a memory upgrade is the answer.
Players get high ping
Compare players in different regions. Check server location, routing, Wi-Fi, congestion, and competing uploads. Ethernet and a closer server region may help. RAM and NVMe cannot shorten the geographic network path.
Server crashes with OutOfMemoryError
Read the full error and log context: heap exhaustion and native-memory failures are different. Check -Xmx, actual free machine memory, player load, and plugin/mod behavior. A memory leak may return after every upgrade. If Linux kills Java without a Java exception, check the journal and available memory for an OS out-of-memory event. Leave OS headroom instead of increasing the heap indefinitely.
Friends are not whitelisted, or the version is incompatible
Check usernames with whitelist list in the server console and add the correct accounts. Match the Java client release to the server; a Bedrock client is not compatible with a plain Java server. A successful TCP test cannot validate these game-level checks.
“Failed to bind to port” or world already in use
Stop the duplicate process, verify server-ip= is blank unless deliberately configured, and inspect the configured port. Do not launch a manual server while systemd already owns the same world. Never remove a world lock file merely to force two processes to access the world.
What About Minecraft Bedrock Edition?
Bedrock has separate official Dedicated Server downloads for Windows and Ubuntu Linux. It does not run the Java server.jar used here. Check its current supported OS versions before installation.
Its standard ports are UDP 19132 for IPv4 and UDP 19133 for IPv6, rather than Java's TCP 25565. Use its own server properties reference and setup documentation. Bedrock settings, allowlists, and client limitations deserve a separate tutorial; do not copy this Java firewall rule and assume it covers Bedrock.
How Much Does It Cost to Host a Minecraft Server?
Home PC: the official server download has no hosting subscription, but electricity, internet service, hardware wear, storage, and uptime still cost something. Players need legitimate access to the game. For free-service tradeoffs, see our free Minecraft server hosting guide.
VPS: cost depends on CPU allocation, RAM, storage, region, bandwidth, backups, and billing terms. A powered-off instance may still reserve billable resources. Estimate the actual always-on cost rather than comparing only an hourly headline rate.
Managed hosting: plans may be sized by RAM, player slots, or bundled resources. Compare backup retention, storage, mod support, and renewal terms. Our WiseHosting review and Bloom Host review examine managed options when a game panel is preferable to OS administration.
There is no single industry-wide price that fits every server. This tutorial does not quote a provider price or promise a player count for a specific budget.
Quick Setup Checklist
- Choose Minecraft Java Edition and the server release your players will use.
- Install a compatible Java runtime and check
java -version. - Download the official server JAR or Paper into a dedicated folder.
- Run it once to generate configuration files.
- Read the EULA and set
eula=trueonly if you agree. - Configure
server.properties, preserving account authentication. - Start the server, enable the private-server whitelist, and add players.
- Allow TCP 25565 in the host firewall and any provider firewall.
- Configure home router port forwarding if needed and check for upstream NAT.
- Set up consistent backups with an off-server copy; on Linux, enable systemd.
- Test joining from an external network with the correct client and account.
FAQ
Can I host a Minecraft server for free?
The official Java server software is free to download. Running it on hardware you already own avoids a hosting subscription, but electricity, internet access, hardware, and a licensed game account for each player still matter.
How much RAM do I need for a Minecraft server?
Start around 2–3 GB of Java heap for 2–5 Vanilla players or 3–4 GB for 5–10 players, then measure actual use. Modpacks can need 6–12 GB or more. Leave additional RAM for the operating system and Java outside the heap.
Can I host a Minecraft server on my own PC?
Yes. Install compatible Java, run the server JAR in its own folder, accept the EULA if you agree, and configure access. The PC must remain awake while friends play, and running the game client on the same PC needs extra resources.
What port does a Minecraft server use?
Java Edition uses TCP 25565 by default. Bedrock Dedicated Server normally uses UDP 19132 for IPv4 and UDP 19133 for IPv6. Match firewall rules to the edition and configured port.
Do I need a public IP to host a Minecraft server?
LAN-only play does not need a public IP. Direct internet access needs a publicly reachable address and an allowed network path; home IPv4 hosting usually also needs port forwarding. A VPS, suitable tunnel, or managed host can provide another route when CGNAT prevents inbound connections.
Is 4 GB RAM enough for a Minecraft server?
A 4 GB Java heap can be a useful starting point for a small Vanilla or light Paper server. A machine with 4 GB total RAM cannot safely give all 4 GB to Java. Large modpacks, heavy plugins, or high simulation distances can require more.
Can I run a Minecraft server on a VPS?
Yes. Use a supported Linux release, compatible Java, a dedicated service user, systemd, and TCP 25565 rules in both the operating-system and provider firewalls. Choose CPU performance, memory, storage, and a region appropriate for your players.
Is Paper better than Vanilla?
Paper suits servers that need plugins, profiling, and more administration options. Vanilla suits players who want the official server and its exact behavior. Paper can change mechanics, so test technical builds and world migration on a backup first.
How do I let friends join, and why might they be unable to connect?
Use matching Java Edition versions, add friends to the whitelist, and share the LAN address for local play or public address for internet play. If connecting fails, check the running process, TCP 25565, both firewalls, router forwarding, and possible CGNAT. Test from an external network.
Does a Minecraft server need to run 24/7?
Only if players need access at any time. A private group can start the server for each session and stop it safely afterward. Stopping the process saves the world; it does not necessarily stop a VPS provider from billing for reserved resources.
Official References and Version Notes
Technical documentation was checked on September 20, 2026. Recheck requirements before installing a later release.
- Minecraft Java server download and Minecraft 26.1 release notes.
- Minecraft EULA and Usage Guidelines.
- Paper getting started and Java compatibility, Java installation, and server.properties.
- Paper plugin installation, migration, and profiling.
RAM ranges are editorial starting estimates, not official capacity guarantees. The commands are presented for the stated environments; this article is not a hardware benchmark or a claim that every modpack and plugin has been tested.